Digital.ai Release on Minikube
Minikube is not officially supported as an installation platform for Digital.ai Release. The article demonstrates how to install Digital.ai Release on Minikube, for testing and learning purpose. For the list of supported platforms see the Release documentation.
This article is a complement of this tutorial that describes how to install Digital.Release on Minikube but there is a big difference: I do not use Digital.ai Deploy to bootstrap Release on Minikube. I use only kubectl commands.
Using Digital.ai Deploy brings some advantages:
- no need to worry about the commands; Deploys generates the commands and execute them in the right order.
- no need to check the status of each command.
- in case of error, it’s easy to rollback.
That being said, for the sake of simplification, specifically for people new to Digital.ai, I prefer to focus only on Digital.ai Release and kubectl commands.
The article is splitted in three parts:
- Step 1: Minikube configuration
- Step 2: Files configuration
- Step 3: Deployment
Digital.ai Release needs two external components to work: a SGBD to store data and a message broker (mainly used with webhooks). The operator installs PostgreSQL and RabbitMQ in the cluster.
We’ll change some settings in order to optimize performance on a local machine (laptop).
Step 1: Minikube configuration
Prerequisites: Minikube and kubectl are already installed on your machine.
On my machine I use this version:
>minikube version
minikube version: v1.25.2
commit: 362d5fdc0a3dbee389b3d3f1034e8023e72bd3a7
Create a new minikube cluster. Set the settings depending of your machine capabilities. Be sure to set the same version of kubernetes.
minikube start -p release --cpus=6 --memory=8192MB --kubernetes-version=v1.20.0
Add two addons to the cluster to support Ingress:
minikube addons enable ingress -p release
minikube addons enable ingress-dns -p release
Then remove the ingressclass that has been installed:
❯ kubectl get ingressclass
NAME    CONTROLLER             PARAMETERS   AGE
nginx   k8s.io/ingress-nginx   <none>       16h
❯ kubectl delete ingressclass nginx
ingressclass.networking.k8s.io "nginx" deleted
❯ kubectl get ingressclass
No resources found
Minikube is now ready for the installation. Let’s move to the files configuration.
Step 2: Files configuration
Prerequisites:
- A valid Digital.ai Release license
- Access to the Release Operator installation files
All the configuration changes set in the file, specifically persistence size, memory size and number of replicas are done in order to be able to run the minikube cluster on a laptop.
Download the Release Operator files from the Digital.ai web site. For this article I use version 22.1.1 of the operator. Unzip the file. You get a hierachy of files like this:
./README.md
./digital-ai.yaml
./digitalai-release
./digitalai-release/applications.yaml
./digitalai-release/deployment-cr.yaml
./digitalai-release/deployment.yaml
./digitalai-release/environment.yaml
./digitalai-release/infrastructure.yaml
./digitalai-release/kubernetes
./digitalai-release/kubernetes/dairelease_cr.yaml
./digitalai-release/kubernetes/template
./digitalai-release/kubernetes/template/cluster-role-digital-proxy-role.yaml
./digitalai-release/kubernetes/template/cluster-role-manager-role.yaml
./digitalai-release/kubernetes/template/cluster-role-metrics-reader.yaml
./digitalai-release/kubernetes/template/controller-manager-metrics-service.yaml
./digitalai-release/kubernetes/template/custom-resource-definition.yaml
./digitalai-release/kubernetes/template/deployment.yaml
./digitalai-release/kubernetes/template/leader-election-role.yaml
./digitalai-release/kubernetes/template/leader-election-rolebinding.yaml
./digitalai-release/kubernetes/template/manager-rolebinding.yaml
./digitalai-release/kubernetes/template/proxy-rolebinding.yaml
All the files that are not under the ./digitalai-release/kubernetes directory are used by Digital.ai Deploy to deploy Release. Let’s then concentrate only on the files we’ll have to manage:
./dairelease_cr.yaml
./template
./template/cluster-role-digital-proxy-role.yaml
./template/cluster-role-manager-role.yaml
./template/cluster-role-metrics-reader.yaml
./template/controller-manager-metrics-service.yaml
./template/custom-resource-definition.yaml
./template/deployment.yaml
./template/leader-election-role.yaml
./template/leader-election-rolebinding.yaml
./template/manager-rolebinding.yaml
./template/proxy-rolebinding.yaml
We’ll modify only the /dairelease_cr.yaml file.
/dairelease_cr.yamlconfiguration
- Certificate configuration
We first need to generate a new server certificate used by Release. Execute the following command to generate a new certificate:
Set the deployit-passsword-key and keypass values as in the command.
❯ keytool -genseckey -alias deployit-passsword-key -keyalg aes -keysize 128 -keypass deployit -keystore repository-keystore.jceks -storetype jceks -storepass test123
Get the keystore in base64 format:
cat keystore.jks | base64
Open the dairelease_cr.yaml file and set the keystore base64 and the password:
spec:
  KeystorePassphrase: test123
  RepositoryKeystore: zs7OzgAAAAIAAAABAAAAAwALcmVsZWFzZS1rZXkAAAGB....
- License configuration
Convert your license file in base64 and set it in the file.
cat <license.lic> | base64
xlrLicense: LS0tIExpY2Vuc2UgLS0tCkxpY....
- Persistence configuration
Set the storageclass as "standard". I also suggest to modify the persistence size and the number of replicas like this:
spec:
  Persistence:
    Size: 1Gi # default is 8Gi, change optionally
    StorageClass: "standard"
  replicaCount: 1
- Postgresql configuration
Postgesql is used by Release and Keycloak.
Set the storageClass as "standard". I also suggest to modify memory size for the demo like this:
spec:
  postgresql:
    persistence:
      size: 1Gi # default is 8Gi, change optionally
      storageClass: "standard"
- RabbitMQ configuration
Set the storageClass as "standard". I also suggest to modify the memory size and the number of replicas like this:
spec:
  rabbitmq:
    persistence:
      size: 1Gi # default is 8Gi, change optionally
      storageClass: "standard"
    replicaCount: 1 # default is 3
- Network configuration
We’ll do simple setup here. We’ll access the Release console and the Keycloak console using port-forward.
Set the DNS names (‘release.example.com’ and ‘keycloak.example.com’) like this:
spec:
  ingress:
    hosts:
      - release.example.com
    path: /
  keycloak:
    ingress:
      console:
        rules:
          - host: 'keycloak.example.com'
      rules:
        -host: keycloak.example.com
In your /etc/hosts file associate the names release.example.com and keycloak.example.com to 127.0.0.1
- Keycloak configuration
In order to simplify the installation, we’ll not configure OIDC for Digital.ai Release. Check upcoming article on OIDC. For now we disable the Keycloak use. Change like this:
spec:
  keycloak:
    install: false
  oidc:
    enabled: false
We are done for the configuration and ready to deploy the files in our minikube cluster.
Step 3: Deployment
As explained at the beginning we’ll not use Digital.ai Deploy for the deployment. We’ll use only kubectl commands.
Execute the following commands:
> kubectl apply -f template/custom-resource-definition.yaml
customresourcedefinition.apiextensions.k8s.io/digitalaireleases.xlr.digital.ai created
> kubectl apply -f template/leader-election-role.yaml
role.rbac.authorization.k8s.io/xlr-operator-leader-election-role created
❯ kubectl apply -f template/cluster-role-manager-role.yaml
clusterrole.rbac.authorization.k8s.io/xlr-operator-manager-role created
❯ kubectl apply -f template/cluster-role-metrics-reader.yaml
clusterrole.rbac.authorization.k8s.io/xlr-operator-metrics-reader created
❯ kubectl apply -f template/cluster-role-digital-proxy-role.yaml
clusterrole.rbac.authorization.k8s.io/xlr-operator-proxy-role created
❯ kubectl apply -f template/leader-election-rolebinding.yaml
rolebinding.rbac.authorization.k8s.io/xlr-operator-leader-election-rolebinding created
❯ kubectl apply -f template/manager-rolebinding.yaml
clusterrolebinding.rbac.authorization.k8s.io/xlr-operator-manager-rolebinding created
❯ kubectl apply -f template/proxy-rolebinding.yaml
clusterrolebinding.rbac.authorization.k8s.io/xlr-operator-proxy-rolebinding created
❯ kubectl apply -f template/controller-manager-metrics-service.yaml
service/xlr-operator-controller-manager-metrics-service created
❯ kubectl apply -f template/deployment.yaml
deployment.apps/xlr-operator-controller-manager created
Wait here and check the deployment status:
❯ kubectl get deploy
NAME                              READY   UP-TO-DATE   AVAILABLE   AGE
xlr-operator-controller-manager   1/1     1            1           43s
When ready execute the last command:
❯ kubectl apply -f dairelease_cr.yaml
digitalairelease.xlr.digital.ai/dai-xlr created
Wait and check the pods status. Be Patient, it could take up to 20 min to start all the pods depending of your machine.
After a few minutes al the pods will be running:
❯ kubectl get pods
NAME                                                              READY   STATUS    RESTARTS   AGE
dai-xlr-digitalai-release-0                                       1/1     Running   0          8m50s
dai-xlr-nginx-ingress-controller-79fc556557-qc5bb                 1/1     Running   0          8m50s
dai-xlr-nginx-ingress-controller-default-backend-76fdbc6466m99j   1/1     Running   0          8m50s
dai-xlr-postgresql-0                                              1/1     Running   0          8m50s
dai-xlr-rabbitmq-0                                                1/1     Running   0          8m50s
xlr-operator-controller-manager-6998678c6b-z8pt4                  2/2     Running   0          10m
Check services:
❯ kubectl get services
NAME                                               TYPE           CLUSTER-IP       EXTERNAL-IP   PORT(S)                                 AGE
dai-xlr-digitalai-release                          ClusterIP      10.101.94.26     <none>        80/TCP                                  9m14s
dai-xlr-nginx-ingress-controller                   LoadBalancer   10.109.18.32     <pending>     80:30372/TCP,443:30098/TCP              9m14s
dai-xlr-nginx-ingress-controller-default-backend   ClusterIP      10.98.154.118    <none>        80/TCP                                  9m14s
dai-xlr-postgresql                                 ClusterIP      10.101.219.66    <none>        5432/TCP                                9m14s
dai-xlr-postgresql-headless                        ClusterIP      None             <none>        5432/TCP                                9m14s
dai-xlr-rabbitmq                                   ClusterIP      10.105.144.103   <none>        5672/TCP,4369/TCP,25672/TCP,15672/TCP   9m14s
dai-xlr-rabbitmq-headless                          ClusterIP      None             <none>        4369/TCP,5672/TCP,25672/TCP,15672/TCP   9m14s
kubernetes                                         ClusterIP      10.96.0.1        <none>        443/TCP                                 11m
xlr-operator-controller-manager-metrics-service    ClusterIP      10.110.18.167    <none>        8443/TCP                                10m
As we can see, the service dai-xlr-digitalai-release listens at port 80 in the cluster. To access the Release console, we need a port-forward (I set 5516 as it’s the default port for the console):
kubectl port-forward svc/dai-xlr-digitalai-release 5516:80
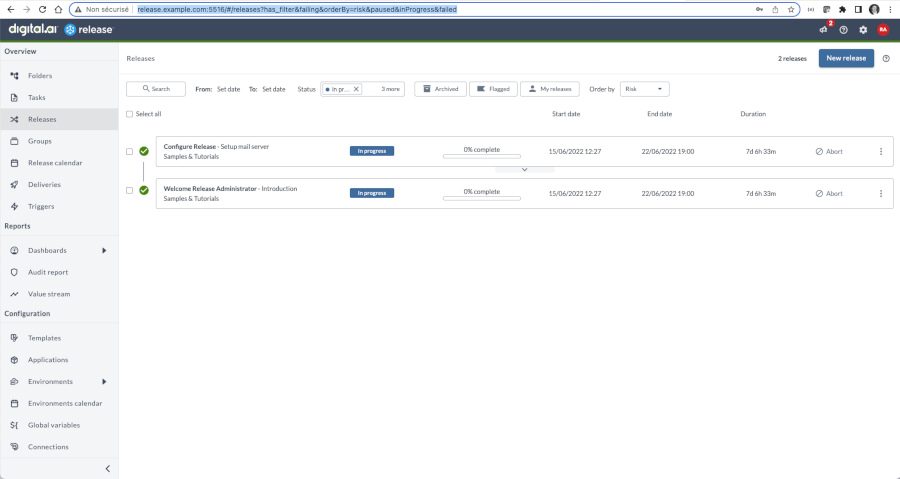
You can access the release console at http://release.example.com:5516 and connect with the admin user.
To get the password for the admin user:
❯ kubectl get secret dai-xlr-digitalai-release -o jsonpath='{.data.release-password}'
YWRtaW4=
❯ echo 'YWRtaW4=' | base64 --decode
admin
Enjoy Digital.ai Release!